Showing posts with label vegetarian. Show all posts

Friday, December 4, 2015

Recipe: Broccoli Cheddar Soup with Gluten Free Garlic-Herb Croutons


You say hangover, I say broccoli cheddar soup bread bowl. 

Or, I did say.

In college, (pre-Celiac diagnosis), my go-to for nursing a rough but probably well-deserved hangover was a Panera bread bowl filled to the carby brim with broccoli cheddar soup. 


That's right. A bowl of gluten, filled with gluten. I am so, so sorry, body. I just had no idea. 

:(


These days, I still LOVE me some broccoli cheddar soup, with or without the prerequisite hangover. I'd like to think this recipe is a tad healthier than Panera's version, since it only has a cup of cheese and a quarter cup of heavy cream (which really you could leave out if you wanted to). The soup gets a lot of body and richness from cooking and blending the broccoli stalks, which I'm happy to use instead of tossing them!


In place of the bread bowl of days past, I top each bowl of soup with a handful of crispy, garlic-herb croutons made from Against the Grain Gourmet baguettes. Have you guys had these baguettes? They're incredible. I can't even keep them around at my parents' house because my sister (non-Celiac) likes them better than regular bread. Go figure! 


This recipe ROCKS if you have an immersion blender. (I have this one.) You can totally transfer the soup to a blender in batches, but if you make a lot of pureed soups and sauces you should really think about making the switch. There's less cleanup, and honestly it's SO fun to whiz everything up right in the pot. Though beware of splashing. Or your dog will end up with a splash of bright green broccoli cheddar soup on his head.... that you don't find until 4 hours later. MMM LEFTOVERS. 


Recipe: Broccoli Cheddar Soup
[original recipe by Jeff Mauro]

Ingredients
2 stalks of broccoli (about 1.5 pounds)
2 tbsp butter
1 small white or yellow onion, roughly diced
2 tsp dry mustard 
1 tsp salt
1/2 tsp black pepper 
2 to 3 cloves garlic, roughly chopped
1 tbsp red wine vinegar or balsamic vinegar 
4 cups gluten free chicken stock, plus extra if needed (can sub vegetable stock)
2 cups fresh baby spinach 
1 cup extra sharp, grated cheddar cheese
1/4 cup heavy cream

Instructions
Remove the florets (tops) from the broccoli, and separate into individual florets. With a sharp paring knife or vegetable peeler, remove the outer layer of the remaining stalks. Roughly dice. 

In a large, heavy-bottomed pot (like this one), melt the butter over medium heat. Once melted, add the onion, broccoli stalks, dry mustard, salt and pepper. Saute for 5 minutes, stirring occasionally. Add the garlic, and cook for 2 more minutes. 

Deglaze by adding the vinegar and 1 cup of the stock. Use a wooden spoon to scrape any brown bits off the bottom of the pot. Add all of the broccoli florets, and enough additional stock to cover the broccoli. (I added 3 cups, making it 4 cups total.)

Bring the liquid to a boil, then cover with a lid and simmer for 10 minutes until broccoli stalks and florets are tender. (Should be able to easily pierce them with a knife.) 

Remove the soup from the heat. Stir in the spinach. Using an immersion blender, blend until the soup is completely smooth. (If you're using a blender instead, CAREFULLY transfer the soup to the blender, filling only halfway, and blend until smooth. You'll probably need to do this in two batches, then return it to the pot.) If your soup is a bit too thick, add more stock to achieve the desired consistency. 

Stir in the shredded cheese and heavy cream. Serve warm, garnished with gluten free croutons (recipe below). 
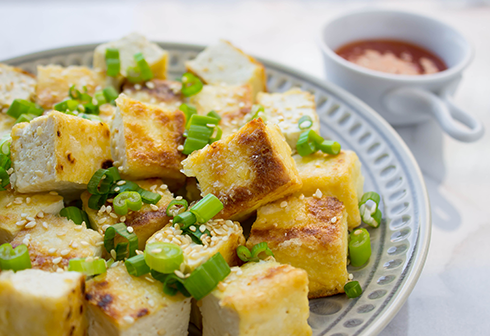

Recipe: Gluten Free 
Garlic-Herb Croutons 

Ingredients
1 gluten free baguette (such as Against The Grain), thawed and diced into 1-inch cubes
2 tbsp olive oil
1/4 tsp garlic powder
1/2 tsp Italian seasoning 
Salt and pepper, to taste
2 tsp grated Parmesan cheese
1 tbsp chopped, fresh herbs (e.g. basil, parsley, chives)

Instructions
Preheat oven to 375 degrees.

Add the bread cubes to a large bowl. Drizzle the olive oil around the inside of the bowl, and toss to coat. Sprinkle the garlic powder, Italian seasoning, salt and pepper over the bread, and toss once more. 

Spread the seasoned bread cubes in an even layer on a foil-lined baking sheet. Bake for 15 to 20 minutes until golden and toasted, tossing halfway through. 

Remove croutons from the oven, and immediately sprinkle with Parmesan cheese and fresh herbs. Toss to coat. 

Can be served immediately, or made ahead of time and stored in an air-tight container. 

Monday, November 23, 2015

HEAVEN ON EARTH aka Sweet Potato Casserole with Brown Sugar & Pecan Streusel Topping

These potatoes. They're uh, not good for you. 


But what they lack in nutrition they make up for in sweet, nutty streusel topping.

And BELIEVE YOU ME THEY ARE WORTH IT. I've been eating them for as many Thanksgivings as I've had the ability to form memories, and I'm still here. I also plan to eat them for every future Thanksgiving forever and ever AMEN. 


I tried to secure the original original recipe, but it's on a food-stained, torn-out page of Bon Appetit and smooshed between the pages of one of my mom's cookbooks. In good news, it's also on the internet


The way our family makes this is pretty close to the Bon Appetit recipe, with a few exceptions. One, we increase the amount of streusel for a topping-to-tater ratio that is actually probably illegal. Two, we change up the preparation a bit, including using a hand mixer instead of a food processor to puree the potatoes. (My mom doesn't have a food processor, and my lil baby processor would only fit about 3 spuds.)


The entire recipe is fairly painless, with the exception of peeling 5 pounds of potatoes. No way around that, unfortunately. But the reward is GREAT and SUGARY and BUTTERY. So get to peelin'. Or task someone else with gettin' to peelin'.


Either way, these are a welcome addition to any Thanksgiving spread. We're still a few days out from the big event, so check out the 'make-ahead' options below if you're looking to get a head start.

Also! Here are a few other holiday recipes to round out your feast:
AppetizersEndive w/ Smoked Salmon & Boursin CheeseSalted Rosemary Marcona AlmondsCaprese Bites w/ Balsamic DrizzleBrie-Apple Bites w/ Pecans & Honey
MainsApple & Cranberry Studded Stuffing w/ Quinoa & SausageApple & Cranberry Studded Stuffing w/ Sausage (no quinoa) 
CocktailRosemary & Pomegranate Champagne Cocktail
DessertsEasy Pumpkin Pudding Cranberry Lemon CakePumpkin Pie with Oatmeal Cookie Crust


Recipe: Sweet Potato Casserole with Brown Sugar & Pecan Streusel Topping
[original recipe by Bon Appetit

Options for Make-Ahead
Option 1: Spread the potatoes in the pan, add the streusel topping, and refrigerate until ready to bake. 
Option 2: Spread the potatoes in the pan and make the streusel topping. Refrigerate both separately. Once ready to bake, sprinkle the streusel on the potatoes. 
Option 3: Complete the recipe (baking the casserole for 1 hour), refrigerate, and reheat in the oven until heated through. 

Ingredients
5 lbs sweet potatoes, peeled and cut into chunks 
3 tsp kosher salt, divided into 1 tsp and 2 tsp
4 large eggs
3 tbsp real maple syrup
2 tbsp vanilla extract
1 tbsp fresh lemon juice
1.5 cups packed brown sugar
1 cup roughly chopped pecans (can up to 1.5 cups if you'd like)
1 stick chilled butter, cut into small cubes

Instructions
Preheat the oven to 350 degrees. 

Add the cubed sweet potatoes to a large pot. Cover with water, and add 1 teaspoon of salt. Bring to a boil over high heat, then cook for 10 minutes until the potatoes can easily be pierced with a fork. 

Drain the potatoes, and return to the hot pot. Let sit for at least 5 minutes to steam off any excess liquid. For the next step, you can either transfer the potatoes to a large mixing bowl, or blend them right in the pot. 

Use a hand mixer to puree the potatoes until no chunks remain. (If you don't have a hand mixer, you can use a food processor.)

In a small bowl, whisk together the eggs, maple syrup, vanilla, lemon juice and 2 teaspoons of salt. Pour the liquid mixture into the bowl of pureed potatoes. Mix once more with the hand mixer until the liquid is incorporated into the potatoes. 

Scrape the potatoes into a greased 13 by 9 inch pan (glass or metal). Use a spatula to evenly smooth the top. 

In another small bowl, make the streusel topping by combining the brown sugar, pecans and cold butter cubes. Use your fingers to work the ingredients together and break up the bits of butter. Continue until the mixture resembles the texture of clumpy, wet sand. Sprinkle the topping evenly over the potatoes. 

Place the pan in the oven and bake, uncovered, for 1 hour until top is bubbly. Let sit for at least 10 minutes before serving. (Topping will harden a bit.) 

Thursday, September 3, 2015

Recipe: Quinoa Tabouli Salad with Lemon Vinaigrette


There's nothing quite like eating a REAL lunch to make you feel like you actually have your shit together. 

Not knocking the string-cheese quesadilla or an almond-butter & fluff sandwich, of course. They just feel a bit, ehm, desperate. As in I desperately need to go food shopping and reacquaint myself with actual foods that grow out of the earth. (HELLO VEGETABLES WHAT R U.)


Any time I'm in a lunch-rut (which is........ often), this quinoa tabouli salad pulls me right on out. I make one big batch in the beginning of the week, then keep the salad and the dressing separate in the fridge. Each day when I'm ready to eat, I mix up a smaller bowl of the quinoa salad with a big glug of lemon vinaigrette. This way the herbs and veggies stay nice and crisp throughout the week. 


When I'm feeling especially hangry or when feeding a boy who thinks there is no such thing as 'too much protein', I'll throw in a drained can of tuna or a few scoops of drained, rinsed beans (white cannellini or garbanzo). I'm sure you could get away with chicken, too, but... meh. Chicken.


Oh PS: shake up your salad dressings in jars!! They don't even have to be of the mason variety. Any clean jar will do. (I hoard Talenti gelato containers & Trader Joe's roasted red pepper jars.) Vinaigrettes tend to do that rude separating thing when they sit for a while, and it's easy enough to just give the jar a quick shake each time you use it.


PPS: I have not a clue what makes sprouted quinoa different from regular quinoa, but TruRoots was kind enough to send me a bag to try and it seemed to cook up just the same. A quick google tells me it's healthier, so basically after one bowl of this stuff I'm SUPER-HUMAN. 


Recipe: Quinoa Tabouli Salad with 
Lemon Vinaigrette 

Recipe Notes
- This makes a really big bowl of salad. It's great for a crowd, or to portion out for lunches throughout the week.
- If you don't like or have mint and/or chives, just leave them out! The parsley is key, so I wouldn't skip that. 
- The salad is pretty filling as-is, but for extra protein toss in drained, canned tuna or a can of drained, rinsed beans (maybe white cannellini or garbanzo).

Ingredients
For dressing (makes just over 1 cup):
1/3 cup fresh lemon juice (from ~3 lemons)
2/3 cup extra virgin olive oil
2 tsp dijon mustard 
2 tsp honey
2 cloves garlic, peeled and grated on a microplane (~1 tsp)
1 tsp salt
1/2 tsp black pepper 

For salad:
1 cup uncooked quinoa (yields ~3 cups cooked; I used TruRoots sprouted quinoa)
1 cup gluten free chicken stock (sub another cup of water for vegetarian)
1 cup water
Olive oil for quinoa 
2 cups cucumbers cut into quarter-moons (equals 4 persian cucumbers)
2 cups diced grape tomatoes (equals almost one 16 oz. container)
1 cup roughly chopped, Italian flat-leaf parsley
1/4 cup chopped mint
1/4 cup chopped chives

Instructions
To cook quinoa:
Add quinoa, chicken stock and water to a pot. Place over high heat and bring to a boil. Once boiling, reduce heat to low (as low as possible), and cover with a lid. Set timer for 15 minutes. Check after 13/14 minutes. As soon as all of the liquid is absorbed, remove from heat. Drizzle cooked quinoa with a bit of olive oil, gently toss, and cover with lid. Let sit for 10 minutes with lid on. 

To make dressing:
Add all dressing ingredients to a jar with a tight fitting lid. (Talenti ice cream containers work great!) Tighten lid, and shake vigorously until dressing is emulsified (will be thicker, creamy and pale yellow). 

To assemble salad:
In a large bowl, gently toss cooled quinoa (MUST be cooled or herbs will wilt) with cucumbers, tomatoes, and fresh herbs. Keep the salad and dressing separate until ready to serve. (I keep both in my fridge and mix up just enough for lunch each day.)

To serve:
Toss your desired portion of the quinoa salad with some of the dressing. Eat cold or room temp.

Wednesday, March 25, 2015

Recipe: Gluten Free Chickpea Crust Pizza (aka CHICKPIZZA)


Okay how clever is 'chickpizza'?? (I can say that because I didn't come up with it.)


Should I trademark it? Is that even the right term? Do I have to give Eric credit or can I pretend I dreamt it up? After all, 'chickpea pizza' is kind of a mouthful...


Here's the origin: Eric (@ephonehome) edits all of my blog pics because he is an angel and I am lazy. Usually he sends the files in a dropbox folder with a fairly NSFW folder name. (Unless your work supports comparing mini hotdogs to mini.. oh nevermind.) When he sent me the folder titled 'Chickpizza' I was like BABE WE'VE STRUCK GOLD THIS IS BRILLIANT........but also is something wrong because I think this is completely appropriate?

So do you know what a chickpizza is yet? It's only my most favorite thing to make for a quick (I mean QUICK) lunch or dinner. The batter is so easy that you'll memorize it after your first try. It's 1/2 cup of chickpea flour, 1/2 cup of water, 1/4 teaspoon of baking powder and 1/4 teaspoon of some seasonings (salt, pepper, garlic powder, etc). No oil, no eggs, and only two different measurements. This legitimately could not be easier unless I came to your house and made it for you. (Which I would totally do since I'm always down to meet some more Internet friends. In a non-creepy way.)

After whisking, the batter is pretty thin, like a crepe batter. It gets poured into a greased pan, cooks for 5 minutes, then gets flipped like a giant pancake. From there, you can top it with pretty much anything. I mean, really, I won't judge. I usually dig around my fridge for whatever pizza-friendly odds and ends are hanging about, slash about to expire.. (Love me a good 'clean out the fridge' meal.) Last night was the last of a jar of vodka sauce, some shredded mozzarella, and a handful of arugula.


Most times, though, I top my chickpizza (yep, still dig it) with pesto (I always have this in my freezer), cheese, a few chopped sundried tomatoes, and a bunch of torn spinach. My. God. Is it good.  
   
The base of the pizza is gluten free (wait did I tell you I'm gluten free?), and based on the toppings it can easily be made vegan, vegetarian, dairy free.... basically anything-free. Except chickpea free cause I'm not a magician OK??


Recipe: Gluten Free Chickpea Crust Pizza (aka Chickpizza) 

Ingredients (makes one, 10-inch pizza)
Crust:
1/2 cup chickpea/garbanzo flour (I use Bob's)
1/4 tsp dried oregano
1/4 tsp garlic powder
1/4 tsp red pepper flakes (optional)
1/4 tsp baking powder
1/4 tsp salt
1/8 tsp black pepper
1/2 cup water
Cooking spray

Suggested Toppings:
1 to 2 tbsp pesto (recipe here)
1/4 cup shredded mozzarella 
1 tbsp sundried tomatoes in oil, drained and chopped
1/4 cup spinach, roughly chopped
1 to 2 tsp parmesan 
Balsamic syrup 

Instructions
In a small bowl (or measuring cup), whisk all dry ingredients (flour, oregano, garlic powder, red pepper flakes, baking powder, salt and black pepper). Add water, and whisk to combine. (Make sure there are no dry pockets at the bottom.)

Heat a 10-inch skillet over medium heat, and coat with cooking spray. Pour all of the batter into the pan. It should spread to the edges, but if not swirl the pan a bit. Cook for 5 minutes. Flip with spatula. 

Set timer for additional 5 minutes. Add toppings in this order: pesto, mozzarella, tomatoes, spinach, and parmesan. Cover pan and cook until the timer runs out. Cheese should be melted, and spinach should be wilted. 

Use spatula to transfer pizza to a cutting board. Drizzle with balsamic syrup, and slice into 6 pieces. 

Tuesday, December 30, 2014

Two 4-Ingredient, No-Cook New Year's Eve Appetizers, Take II

This time last year, I shared two four-ingredient appetizers that are perfect for New Year's Eve. You can find them here, if you'd like. (They're both my mom's recipes so all kudos to that fine woman. My family's been making these for ever and ever.)


This year, I wanted to do the same. I'm a big fan of small bites that are assembly only (i.e. no cooking), and that look pretty all lined up on a platter. Classy appetizers balance out plastic champagne flutes, I figure.... 

They DO NOT balance out losing your phone in your own apartment sometime after midnight. Maybe I'll find it when I move out? 


These two recipes totally fit the bill, and would you look at that? They're each four ingredients. -ish. 


They also both involve cheese, as all good things do. I skipped the crackers since I'm pretty sure you can navigate that one on your own. Plus, these one-biters are naturally gluten free, which takes the guess-work out of finding gluten free crackers that don't taste like cardboard or packing peanuts. (Though put some cheese on that cardboard, and... yep gone.)

How are you guys ringing in 2015? I'll be in a house with a broken oven, so if you have any more no-cook or stove-top recipes please share in the comments! (I'm thinking tacos for dinner - extra guac.) If you'll be somewhere with an oven, these lemon pepper chicken wings are out. of. this. world. I'm already jealous.

Catch ya next year, friends!

Appetizer Recipe 1: Caprese Bites with Balsamic Drizzle 

Note
- Use cherry tomatoes, NOT grape tomatoes. Cherry tomatoes are rounder (as opposed to oblong) so they'll stay upright on the platter, believe it or not. The Kitchn breaks down the difference between the two here.

Ingredients
Cherry tomatoes (see note)
Mozzarella cheese, cubed 
Fresh basil
Balsamic glaze (like this from Trader Joe's)
Salt and pepper, to taste

Instructions
Core the cherry tomatoes by cutting around the stem-end with a paring knife; angle the tip of the knife towards the center of the tomato. Don't cut all the way through to the bottom!

Use a small spoon or the back of a utensil to scrape the seeds and juices out of each cored tomato. (I usually do this right over a garbage can then shake the tomato upside down a few times.)

To assemble each bite, wrap one small basil leaf or half of a large basil leaf around one cube of mozzarella. Stuff the basil-wrapped mozzarella into one of the tomatoes. Repeat with all of the tomatoes, and arrange on a platter. 

Sprinkle salt and pepper over the assembled caprese bites. Drizzle with the balsamic glaze right before serving. 


Appetizer Recipe 2: Brie-Apple Bites with Pecans and Honey


Ingredients
Granny smith apples, sliced and tossed with lemon juice or apple juice to prevent browning
Brie cheese, sliced 
Pecans, roughly chopped and toasted 
Honey 

Instructions
To assemble, top each apple slice with a piece of brie, and a few toasted pecan pieces. Arrange on a platter, and drizzle with honey. (Try running your honey bottle under warm water or resting in a bowl of warm water so it pours easier.)

Possible Substitutions
- Instead of apple: sturdy pear slices
- Instead of brie: goat cheese, blue cheese, sharp cheddar
- Instead of pecans: walnuts, almonds, pistachios
- Instead of honey: warmed jam (maybe raspberry), balsamic glaze 
- Add prosciutto
- BASICALLY DO WHATEVER THE HECK YOU WANT. :) :) :)

Wednesday, October 29, 2014

Recipe: Sweet + Spicy Glazed Squash with Black Sesame Seeds

Maple syrup, I'm so glad you're part of my life. What else can be drizzled on pancakes, AND on vegetables? (Except maybe melted butter and I'll take some of that too please.)


I hate to go all Ina on you here (jk I am LOVING that I squeezed an Ina reference in here), but when it comes to maple syrup I'm talking the good stuff. The stuff that comes in a glass bottle and makes you go 'wtf why would someone pay this much for syrup.' THAT stuff. 


Pure maple syrup is one of those things that I really truly believe is worth paying a little extra for. I pick mine up at the Union Square Greenmarket, which mostly is another excuse to go scout samples of maple candy, lamb sausage, goat cheese and cider. Ooohhhh it's just the best place. Makes me happy just thinking about it.


You can also find squash there! And about everywhere, this time of year. Squash and sprouts are tied for my favorite vegetable right now. The nice thing about smaller squashes like acorn and delicata is that the skin, once roasted, is totally edible. (Butternut or spaghetti squash, not so much.) Also, their size is a bit more manageable which means the odds of cutting them up and keeping all your fingers intact is MUCH much higher. Little easier to enjoy dinner when your appendages are all still attached to your body, dontcha think?


YEA I'M TALKING ABOUT CUTTING OFF APPENDAGES IT'S HALLOWEEN. (Practically.)


Speaking of Halloween - I hope you eat so much damn candy (gluten free, of course) and scare a child or two. This one year my dad rigged up a ghost to swoop down by our front door and a kid peed his pants. In case you need something to aspire to. 

I'll be hibernating (while watching something scary - any recs?) since I have a wedding to go to on Saturday and I'd rather die than be hungover in a gown.

Catch ya in November, dudes! 


Recipe: Sweet + Spicy Glazed Squash with Black Sesame Seeds

Ingredients
1 acorn squash (yellow or green), rinsed and dried 
1 delicata squash, rinsed and dried 
Olive oil, to taste
Salt and pepper, to taste
2 tbsp coconut oil (in liquid form; microwave for 10 secs if it's solid)
2 tbsp pure maple syrup
1 tbsp warm water
1/2 tsp ground cinnamon
1/4 tsp cayenne (reduce to 1/8 tsp if you don't want the heat to be as apparent)
1/4 tsp dried sage
1/8 tsp freshly ground nutmeg
Black sesame seeds (optional)

Instructions
Preheat oven to 425 degrees. Line two baking sheets with foil and coat lightly with cooking spray. 

Cut the top (stem-end) and the bottom off the acorn squash. Rest the squash on one of the flat ends, and cut it in half. Use a spoon to scoop out the seeds. Place one of the squash halves flat on the cutting board (cut-side down), and slice into half-inch thick half-moons. Repeat with the delicata squash. 

Place all of the squash slices in a bowl, and toss with a big drizzle of olive oil, and salt and pepper to taste. Arrange the squash on the baking sheets. The squash can be touching, but make sure the entire bottom of each slice is touching the pan (to ensure browning). 

Roast the squash for 20 minutes, until the bottoms are browned and caramelized. 

While the squash roasts, whisk together the glaze ingredients: coconut oil, maple syrup, water, cinnamon, cayenne, sage and nutmeg. 

After the squash has roasted for 20 minutes, flip each piece so that the brown sides are facing up. Use a pastry brush or silicone brush to coat each piece of squash with the glaze. 

Return pans to oven and roast for an additional 10 minutes. When finished cooking, arrange the squash on a platter and sprinkle with black sesame seeds. 

Thursday, March 27, 2014

How to Make Crispy Pan-Fried Tofu like a CHAMP

Hold the chips. I'll have this, please:


SO WHAT if I snack on crispy, pillowy little tofu cubes. So freaking what if I'm obsessed with the crunchy outside, and soft, silky inside. (Especially when dunked in sweet thai chili sauce, or with a few drops of my new favorite gluten free soy sauce. Hubba Hubba.)


To be fair, these little guys also make their way into vegetable stir fry quite often. (Exhibit A, of many Exhibits.)


My tofu-searing was pretty hit-or-miss for a while, until I read this article on The Kitchn that recommended coating the tofu with cornstarch. AAHH of course there's a secret! And let me tell you, it's pretty foolproof. As long as your pan is hot and you've got a little oil action going on, there will. be. crust. 


Only thing is, I'd kinda rather not flip 24 individual tofu cubes in a screaming hot pan. Instead, I cut the whole block in half, pan-fry each half of the tofu block (which is just TWO pieces to flip - go math), then slice it into cubes. No, all 8 sides of each tofu cube are not crispy. But I never miss it. Besides, I'm usually inhaling them too fast for my mouth to notice.


Really hoping you give this method a shot. If you don't already enjoy tofu, maybe it will even make you a convert? Hey, I'm not trying to sell miracles here. Just some crispaaaaay tofu nuggets. You oughta know.


Recipe: Crispy Pan-Fried Tofu Cubes 
(with Scallions and Sesame Seeds)

Notes
- Instead of cutting the tofu into cubes, you can leave each slab whole and serve it as a main protein. Or, try slicing each slab into strips (like tofu fries)!
- The crispy cubes can be eaten alone (I think they'd make a great appetizer with a cool dipping sauce), or tossed into stir fries, salads, etc. 
- I think a really sharp, serrated knife is important for slicing the crispy tofu without damaging the crust. (I've been using this one for years and it's still SO sharp. Also works magic on tomatoes!)

Ingredients
1 16-oz. block firm tofu
Cornstarch
Canola oil 
Sliced scallions (optional)
Toasted sesame seeds (optional)
Gluten free dipping sauce, like S&F Sweet Thai Chili Sauce (optional)

Instructions
Slice open tofu container and drain out all of the liquid. Pat the block of tofu dry with a paper towel.

Rest the tofu on one of the shorter sides, and slice down the middle with a serrated knife to cut it into two equal slabs. (Slabs? Sure, we'll run with that. See pictures for reference.)

To press some of the liquid out of the tofu, stack three folded-in-half paper towels on a cutting board. Place the two tofu slabs on top, and cover the tofu with three more folded-in-half paper towels. Place a heavy skillet (cast iron, if you have it) and a few cans/jars on top of everything to weigh it down. Leave the tofu to drain for at least 5 minutes. 

Discard the paper towels (which should have soaked up a good amount of liquid). Dust the two largest surfaces of each tofu slab with cornstarch, spreading it out and pressing it in with your fingers. You can optionally coat the sides as well if you want to crisp those too.

Place a large, non-stick skillet over medium-high heat and add enough canola oil to lightly coat the bottom. (I used about 1.5 teaspoons.) Once the oil is really hot, place the two pieces of tofu in the pan, cut side down. 

Cook for 7 minutes (or until the bottom is very golden and has formed a crust). Flip the tofu, and cook for an additional 7 minutes. (You may need to add another splash of oil after you flip.)

At this point, if you cornstarch-ed the sides of the tofu, you can use tongs to sear all 4 of the sides for 1-2 minutes each. (Sometimes I skip this step.) 

Move the tofu to a cutting board and allow it to cool for a few minutes. Use a serrated knife and a gentle sawing motion to slice each slab of tofu into 12 cubes - cutting lengthwise into thirds, then crosswise into fourths (see photos). You'll want to use a really sharp knife, and be gentle so that the crust doesn't tear off.

Now your crispy tofu cubes are ready to be added to stir fries, salads, or eaten alone! If eating them alone, I top them with a handful of sliced scallions and a few big pinches of toasted sesame seeds. They're extra delicious dunked in a sauce like this one.
Related Posts Plugin for WordPress, Blogger...